In this post we will learn how to build a Swift Package using a GitHub Codespace. I did this recently as an experiment. It was easier than expected. The codespace was quick to build and test on too. It could be a useful tool when you have a poor local environment, e.g. an aging Intel MacBook. That said, there’s limitations too.
What are Codespaces
Github codespaces are development environments in the cloud. They allow you to develop from your browser. Opening a codespace displays a VS Code IDE. You can install libraries, dependencies and tools. You can run any code you write in the terminal.
How to Write Swift in a Codespace
Here’s the steps I took to create a codespace where I could successfully run swift package init and swift test.
1. Create initial codespaces
Head over to www.github.com and login.
Create an empty repository, include a README.md.
Select “Codespaces” from the top.
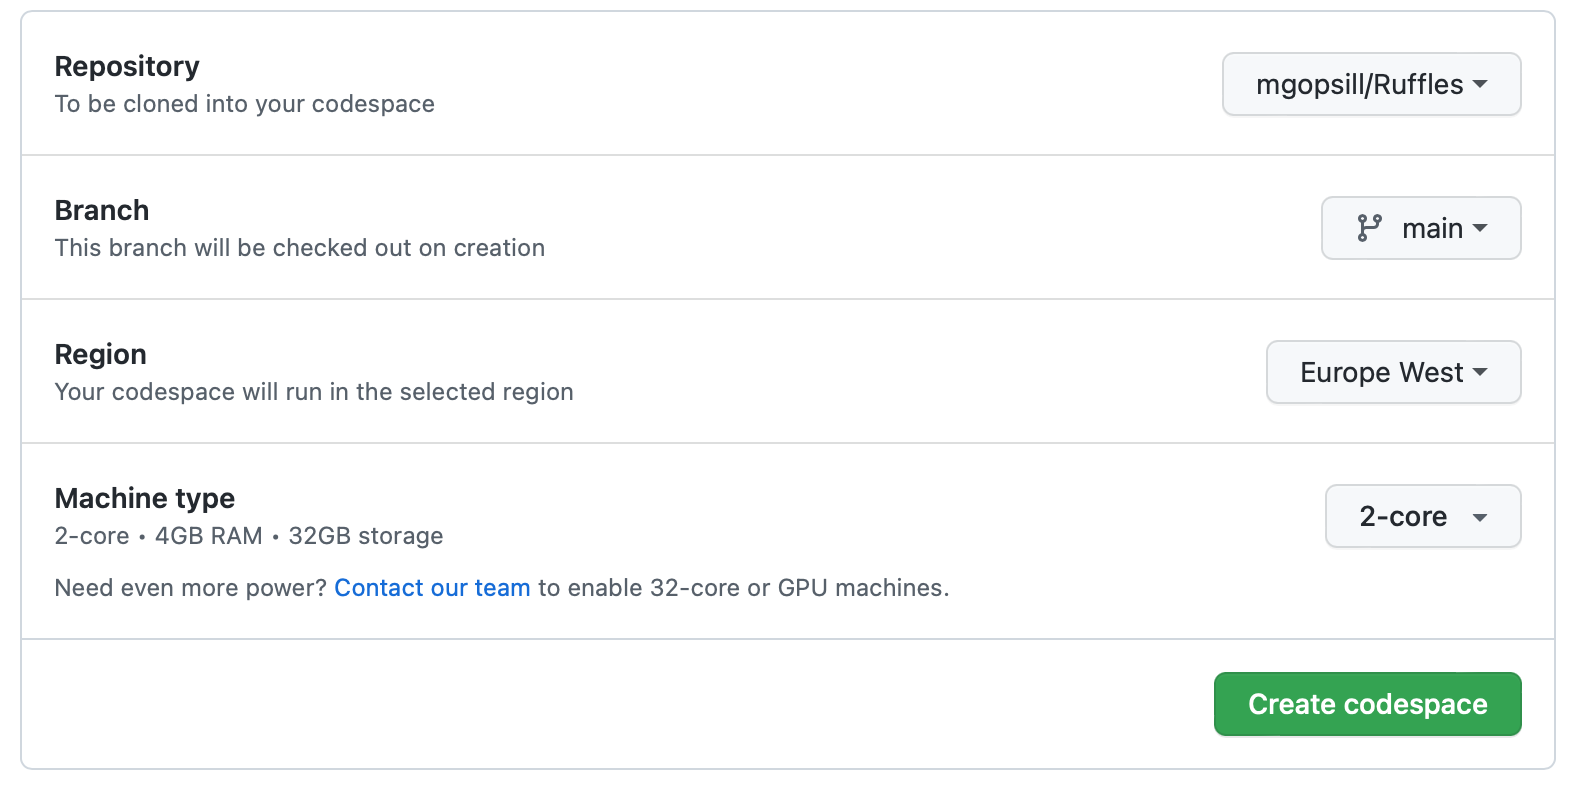
Select New Codespace

Fill in the setup (I used the defaults). Select Create codespace
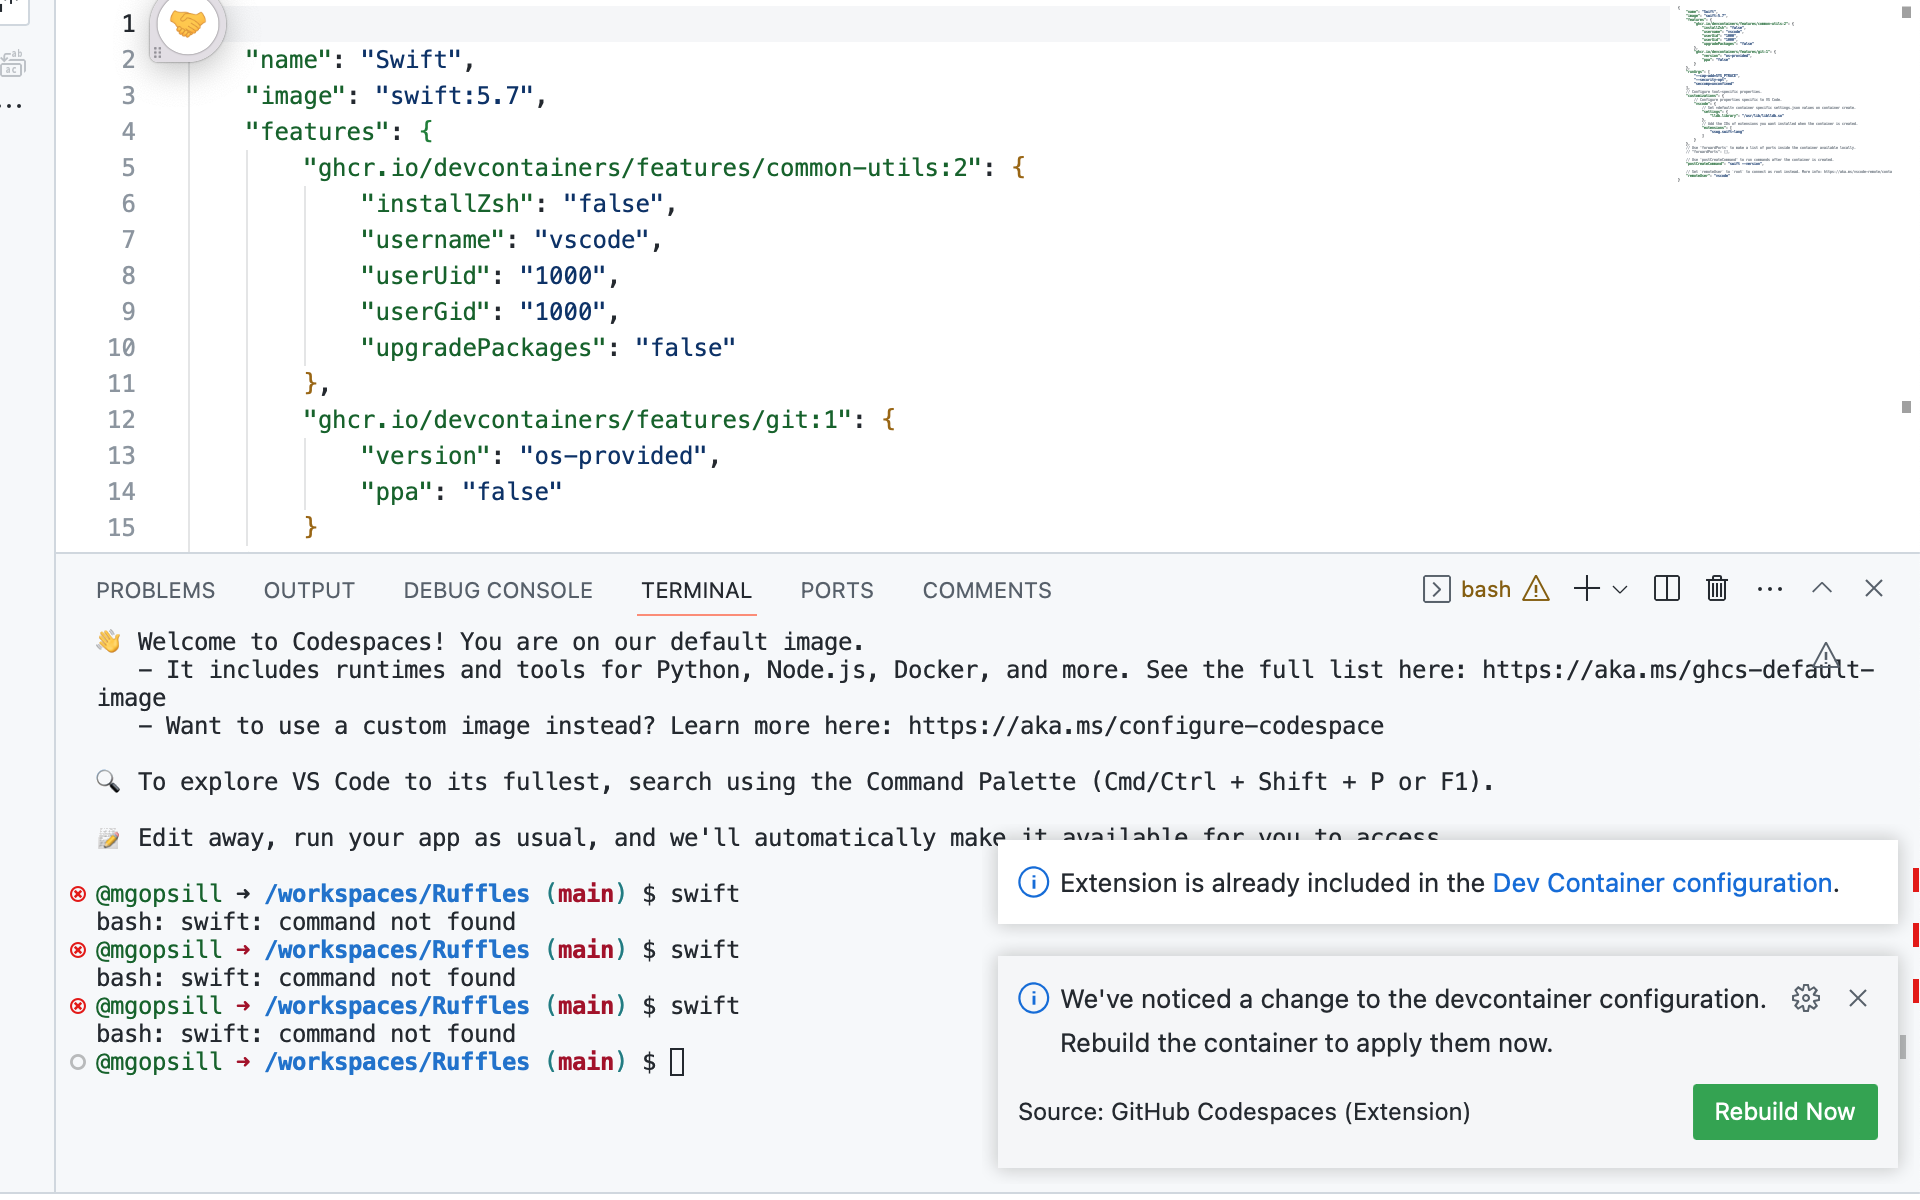
Once the editor has loaded you can try swift in the terminal and see it fail.
$ swift
bash: swift: command not found
2. Setup Swift in the Devcontainer
To install swift we need to add a devcontainer.json file. The IDE can do this for us.
Select the extensions icon on the left tab bar.
![]()
Search for “Swift”
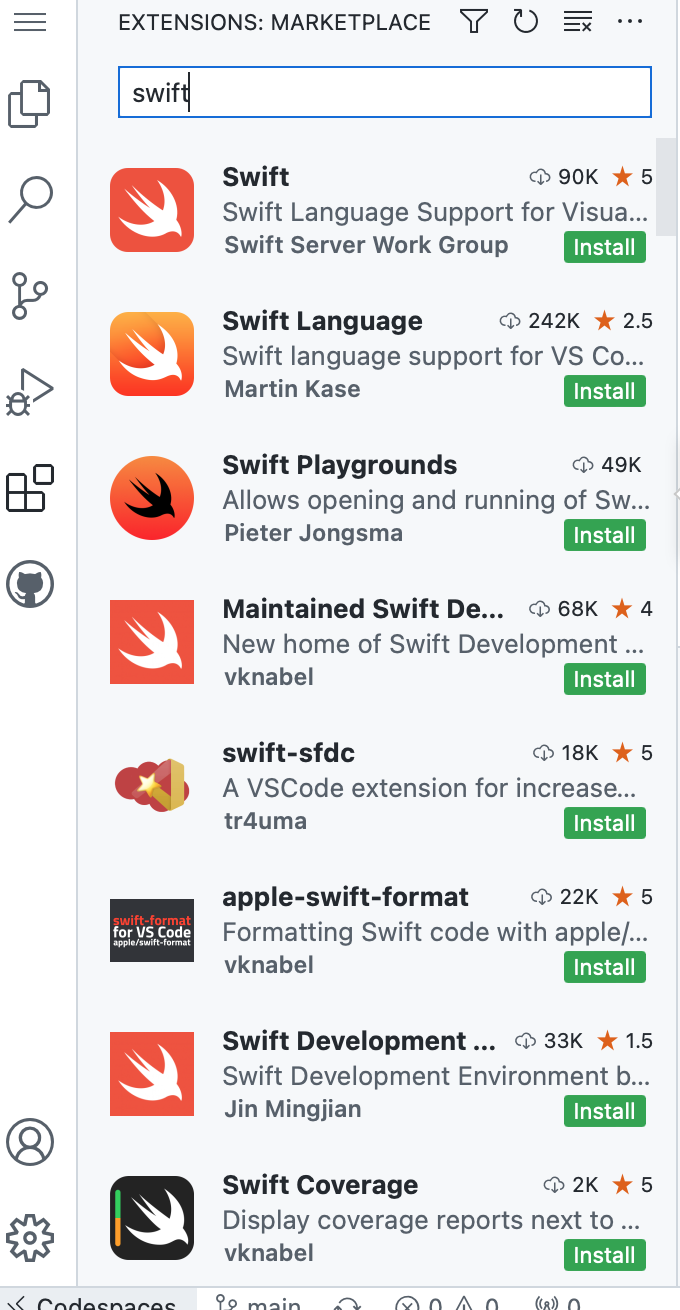
Select Swift from the Swift Server Work Group.
Then select the gear icon and Add to devcontainer.json.
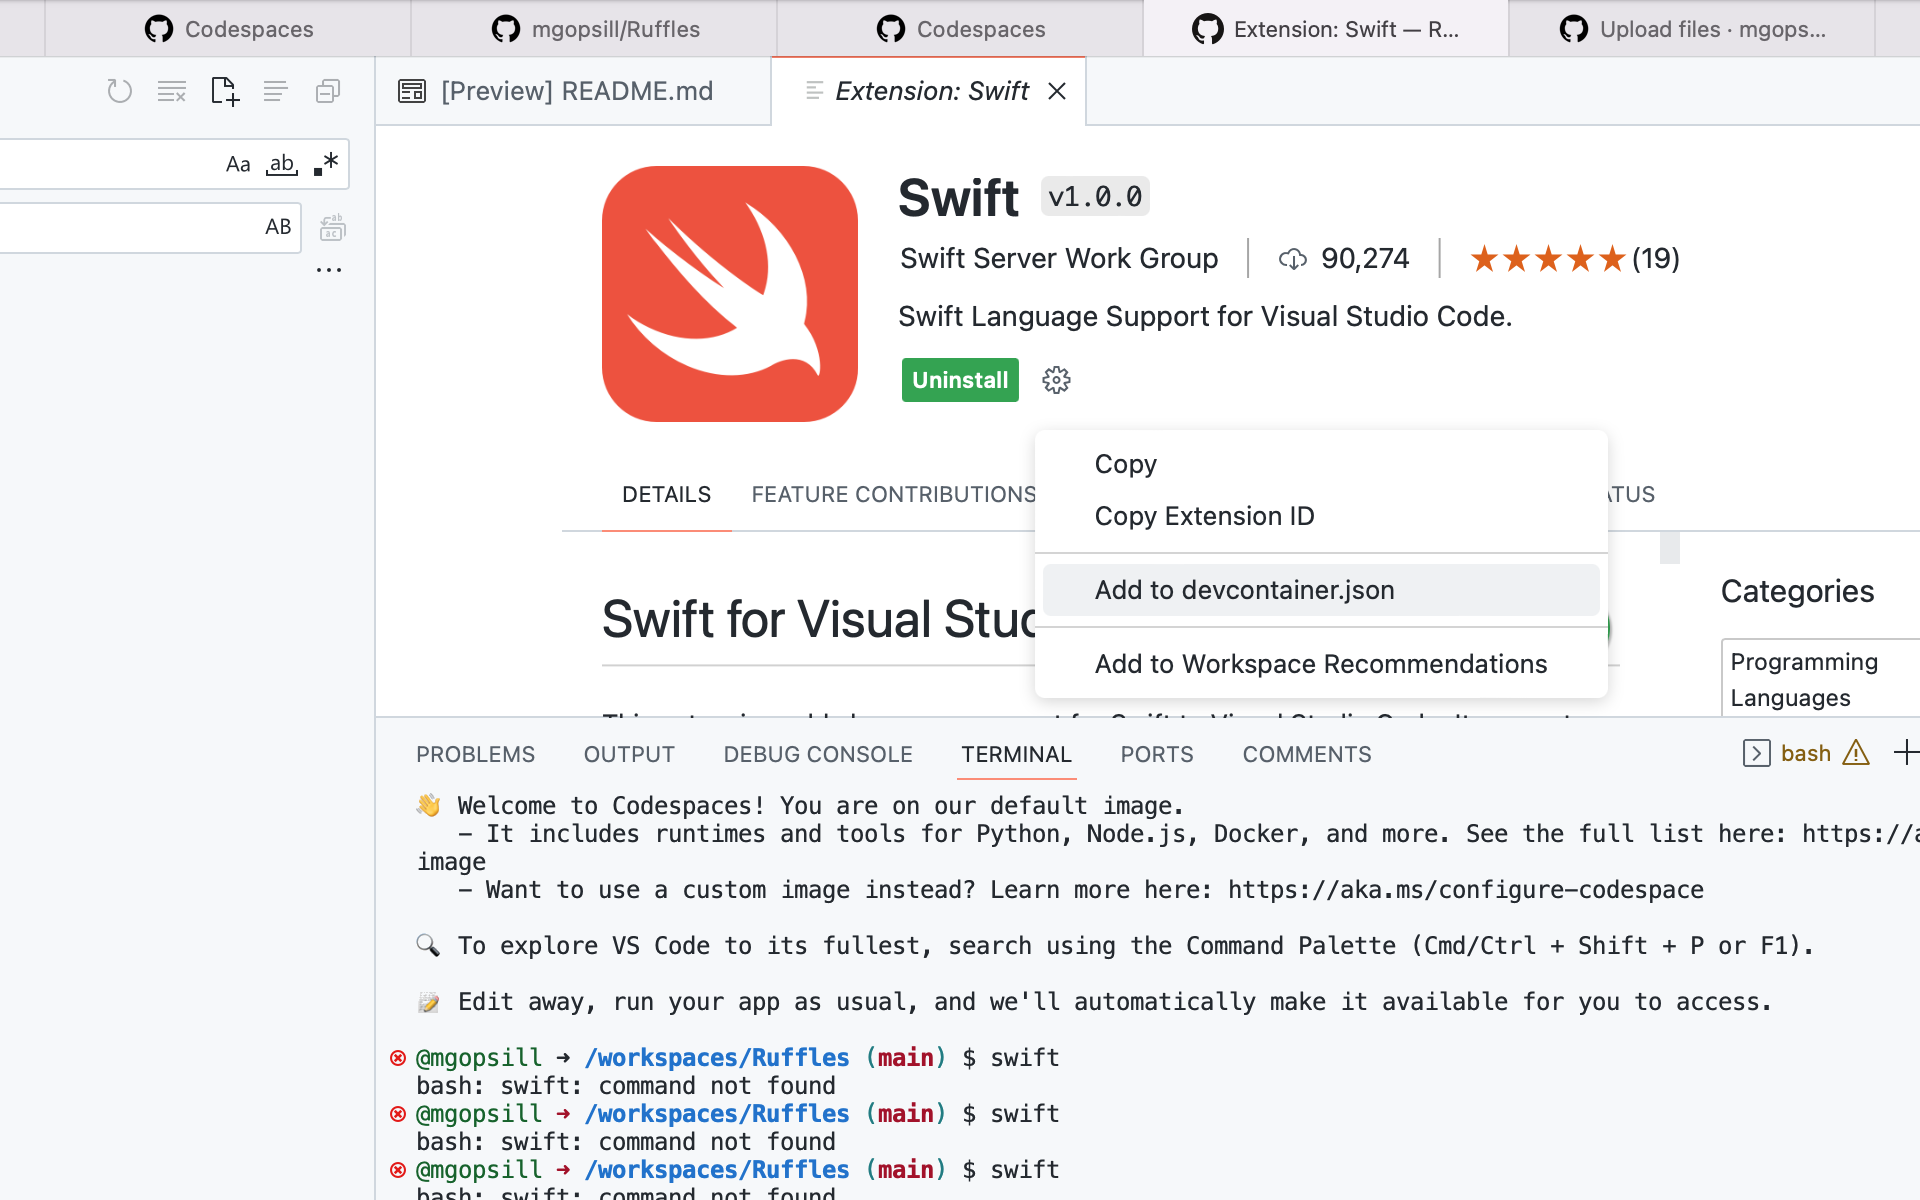
Select Add files…
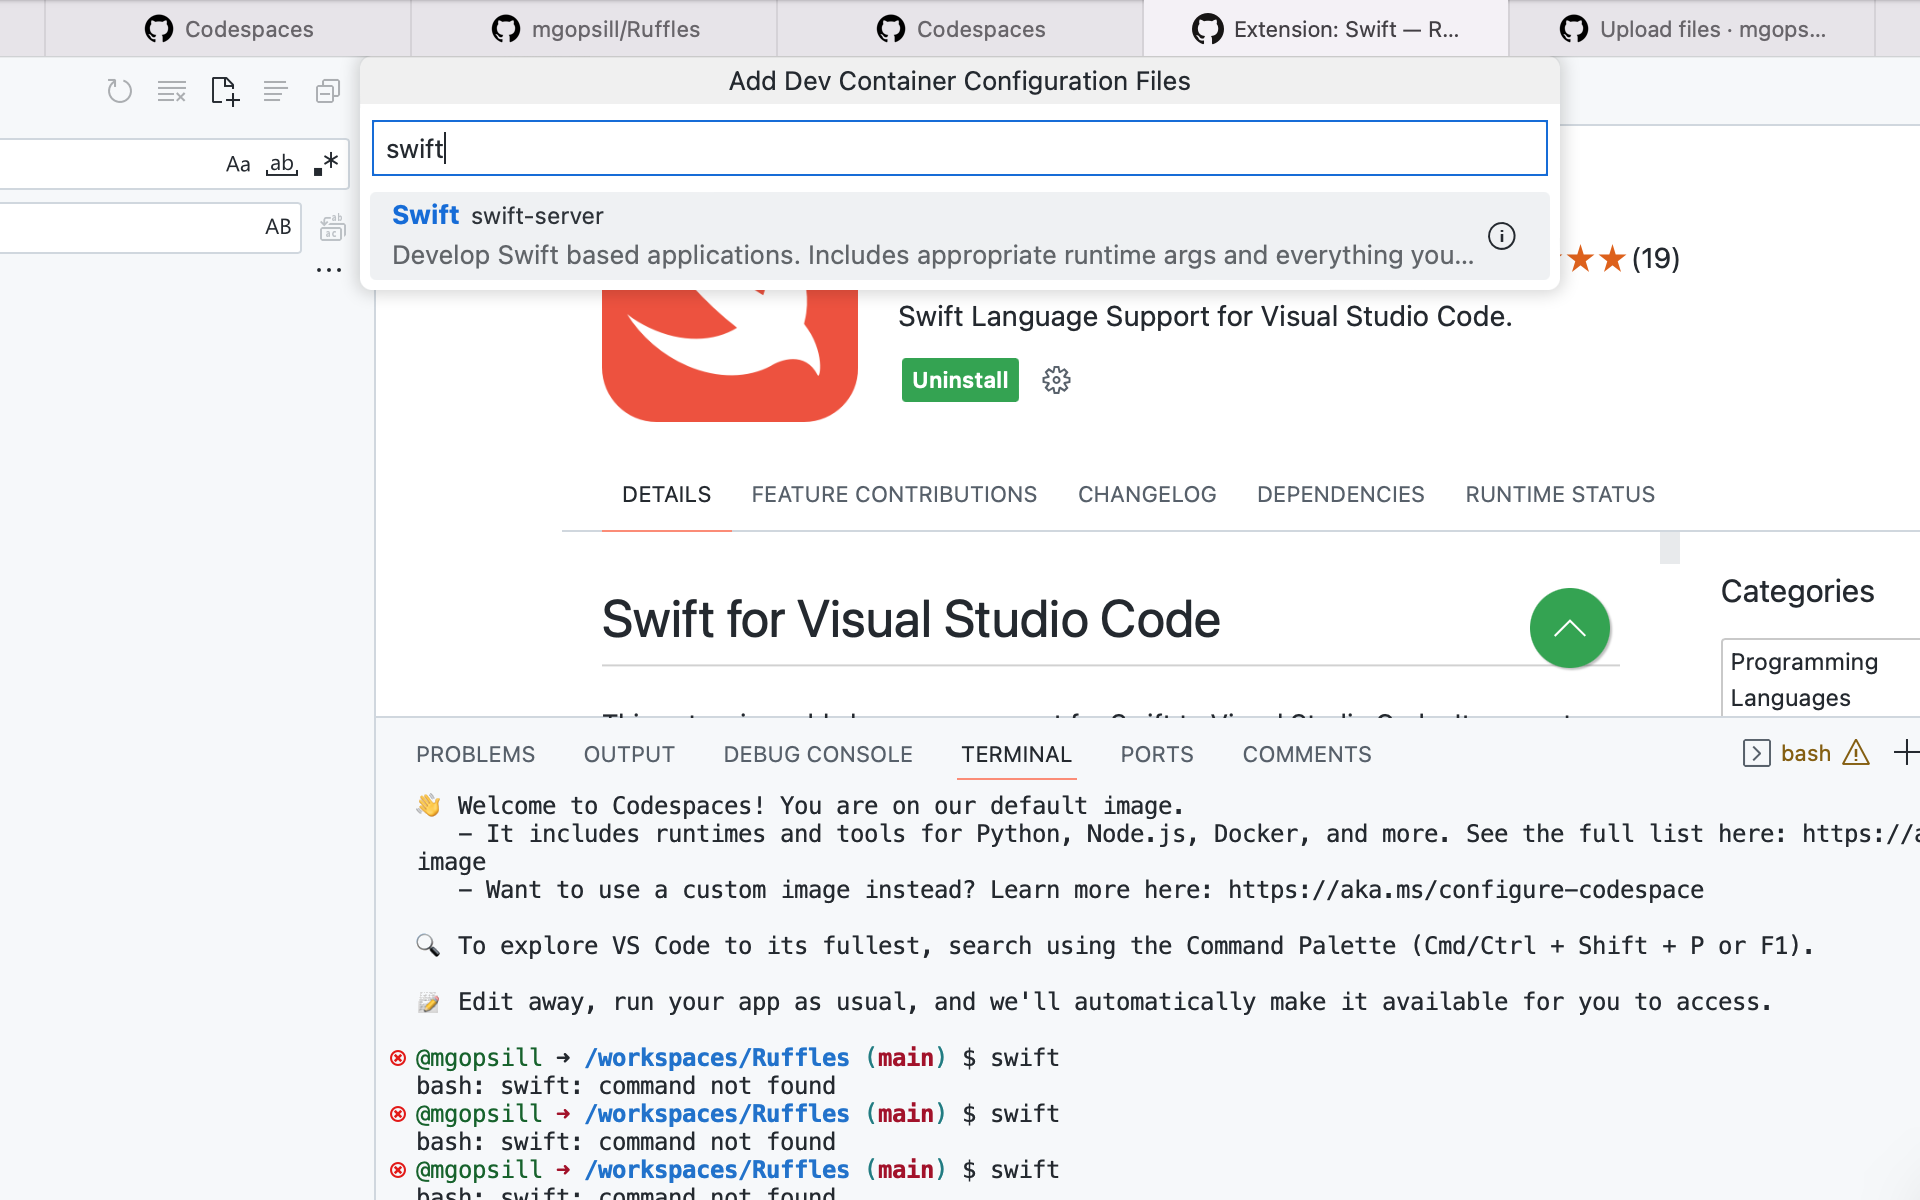
Select Search for all definitions then search for Swift.
Select the top result.
Select a version, None for node and optionally tick Install ZSH.
After all this you should see a Rebuild Now option. Select it.
3. Open New Codespace and run swift
After all the above, the new codespace should load. It may take a while. Once it has loaded, try it.
$ swift package init
Creating library package: Ruffles
Creating Package.swift
Creating .gitignore
Creating Sources/
Creating Sources/Ruffles/Ruffles.swift
Creating Tests/
Creating Tests/RufflesTests/
Creating Tests/RufflesTests/RufflesTests.swift

$ swift test
Building for debugging...
[18/18] Linking RufflesPackageTests.xctest
Build complete! (6.22s)
Test Suite 'All tests' started at 2023-02-16 06:22:23.934
Test Suite 'debug.xctest' started at 2023-02-16 06:22:23.936
Test Suite 'RufflesTests' started at 2023-02-16 06:22:23.936
Test Case 'RufflesTests.testExample' started at 2023-02-16 06:22:23.936
Test Case 'RufflesTests.testExample' passed (0.007 seconds)
Test Suite 'RufflesTests' passed at 2023-02-16 06:22:23.944
         Executed 1 test, with 0 failures (0 unexpected) in 0.007 (0.007) seconds
Test Suite 'debug.xctest' passed at 2023-02-16 06:22:23.944
         Executed 1 test, with 0 failures (0 unexpected) in 0.007 (0.007) seconds
Test Suite 'All tests' passed at 2023-02-16 06:22:23.944
         Executed 1 test, with 0 failures (0 unexpected) in 0.007 (0.007) seconds
Et voila!
Conclusion and Limitation
We got Swift up and running in a Github codespace. But there’s certainly limitations. No simulator, no xcode toolchain, some missing libraries and more. Don’t expect it to replace Xcode anyday soon or ever. Github is owned by Microsoft afterall. But it’s still pretty cool, especially if you just want to run some fundamental Swift code in fast environment.